Getting Started with Github Actions

Github actions are a new way to handle continuous integration and delivery. Automate everything! Github actions has prebuilt integrations with Amazon Web Services, Azure DevOps, Google Cloud, and many other services. The best part is everything is open source, so even if you are deploying to an obscure platform, or require specific tools there is a good chance someone had the same needs and built something that will work for you. My projects are typically smaller web projects, so for our example today we will just run some unit tests in a node project.
Getting Started

Open up the repo you would like to add some automation to and navigate to the Actions tab. You will see some
available options for prebuilt scripts for different types of projects. There is one built for node, but I like to start
with the Simple Workflow instead.
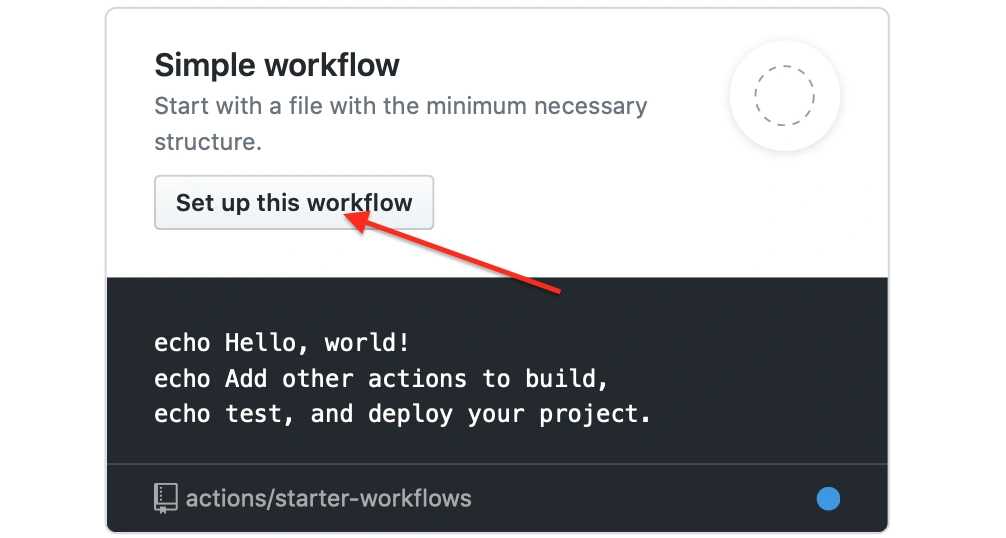
This will take you to a new workflow file placed under .github/workflows/blank.yml. Rename it to something
descriptive and then take a look at the generated script:
 1name: CI
 2
 3on: [push]
 4
 5jobs:
 6  build:
 7    runs-on: ubuntu-latest
 8
 9    steps:
10      - uses: actions/checkout@v1
11      - name: Run a one-line script
12        run: echo Hello, world!
13      - name: Run a multi-line script
14        run: |
15          echo Add other actions to build,
16          echo test, and deploy your project.
You can commit this file and it will run the script!

Now if you navigate back to the actions tab you can take a look at the results under All Workflows you should see
the name of the script.

Click on it to view and expand each step of the workflow.
Build Your Workflow
Give It A Name
1name: test coverage
This one is pretty straightforward. What do you want to call this workflow? It isn’t all that important unless you plan to use the badge from this workflow. Stay tuned for a follow up article about how to use Github Badges.
![]()
Start It
1on:
2  push:
3  branches:
4    - master
on is what will trigger your script. In this case we want the script to run when something gets pushed to the
master branch.
Split Up The Pieces
1jobs:
2  test:
Next we can split out the different jobs of our script. We’ll keep it simple with one job called test.
Environment
1runs-on: ubuntu-latest
This will decide what operating system the “test” job runs on.
Run
 1steps:
 2  - uses: actions/checkout@v1
 3  - name: Setup Node
 4    uses: actions/setup-node@v1
 5    with:
 6      node-version: "12.x"
 7      scope: "@chektek"
 8
 9  - name: Install Dependencies
10    run: npm install
11
12  - name: Run Tests
13    run: npm run test:ci
This is where the real work happens. As you would expect actions/checkout@v1 will checkout the current
repo. actions/setup-node@v1 is going to setup node for you and using with you can specify a version. If you
are familiar with node you’ll where we are headed from here. npm install will look to your package.json and
install the listed dependencies. In my package.json I have my custom scripts setup as follows:
1"scripts": {
2"build": "tsc -p . && cp ./readme.md ./dist/",
3"test": "jest --collectCoverage",
4"watch": "jest --watchAll --expand --collectCoverage",
5"coverage": "jest --collectCoverage",
6"test:ci": "jest"
7}
So npm run test:ci is going to execute jest running my unit tests. If at any point in the workflow something
fails (including the tests) then the Action will be marked red as a failure.
Thank You
Thanks for reading! You can checkout the project that uses this workflow here . View the entire sample workflow here .